General Ledger - Introduction
In this lesson you will learn about using the Accredo system.
After completing this lesson you will be able to:
Create a General ledger Account Code
Understand and Create Analysis Dissections
Understand the Ledger Tree
Enter General Ledger Budgets
Transfer Module Transaction Batches to the General Ledger
Post Batches and Print Financial Reports
Run End of Period Updates.
Table Of Contents
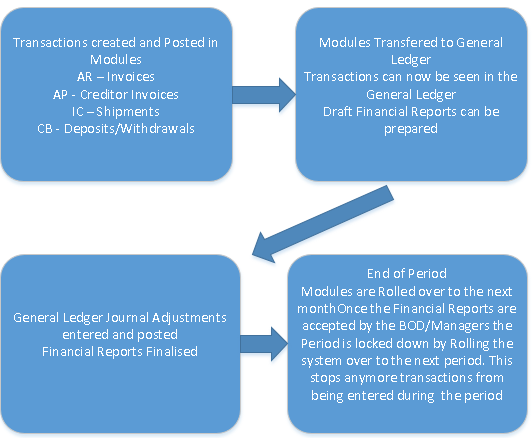
General Ledger End of Month Process Flow
Analysis Dissections
Analysis dissections are used to analyse the financial information component of transactions entered in Accredo. For example, a creditor invoice is analysed into expense dissections, with each dissection line relating to an expense code. Analysis dissection codes are accessible via the Maintain tab.
For each analysis dissection a General Ledger account is to be specified. These specifications will determine the treatment and breakdown of transactions posted to the General Ledger.
The following are the analysis dissection codes:
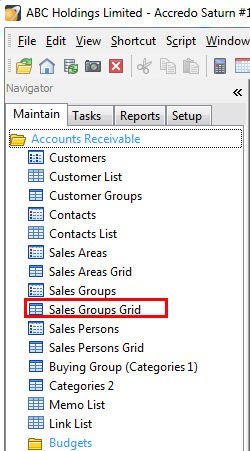
Accounts Receivable
Sales Groups in the Accounts Receivable module
Maintain\Accounts Receivable\Sales Group Grid
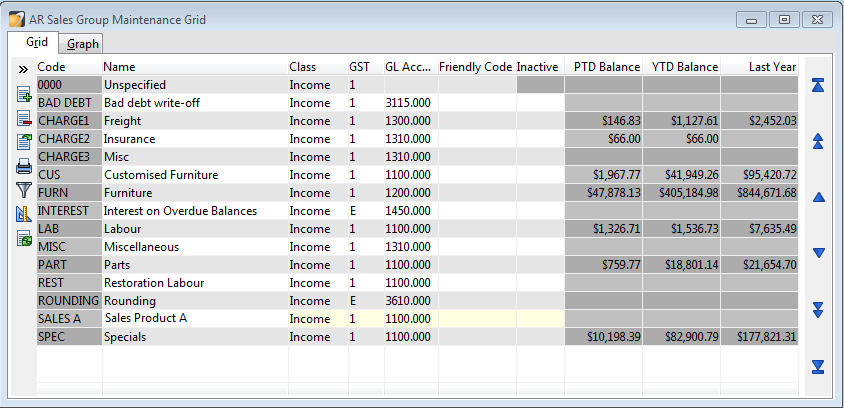
Click ‘Insert’ (F4)

Enter the appropriate information (Short Code and Name)
For example: CODE: Sales A, NAME: Sales Product A
Sales A would have an income class, and would be related to a revenue account in the General Ledger
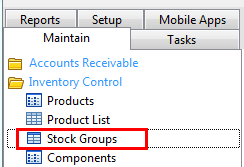
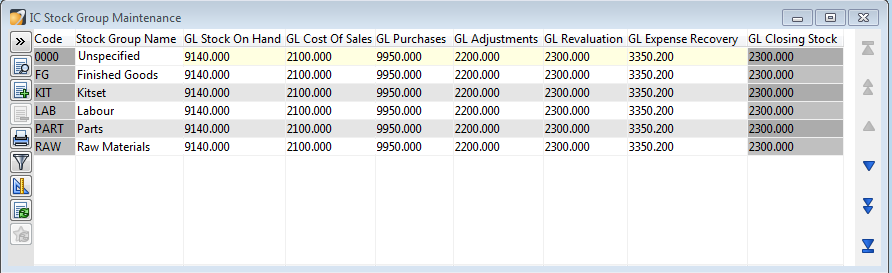
Inventory
Stock Groups in the Inventory Control module
Maintain\Inventory Control\Stock Groups
Click ‘Insert’ (F4)

Enter the appropriate information
For example: CODE: Raw, NAME: Raw Materials
The ‘Raw’ code would relate to the appropriate General Ledger Cost of Sales account, Adjustments account, Revaluation account and Expense Recovery account. (in the Trading account) and Stock on hand account (in the Balance Sheet), and Purchases Cleaning account.
Accounts Payable
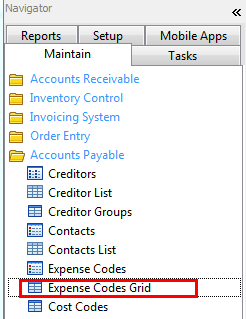
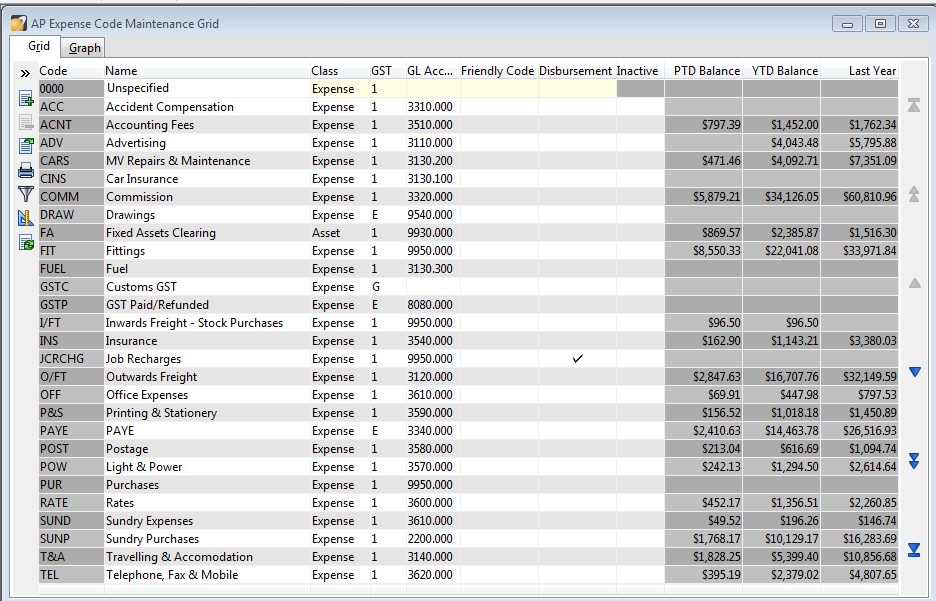
Expense Codes in the Accounts Payable module
Maintain\Accounts Payable\Expense Codes Grid
Click ‘Insert’ (F4)
Enter the appropriate information
For example: CODE: ACC, NAME: Accident Compensation
ACC would have an expense class, and would be related to the ACC expense account in the General Ledger
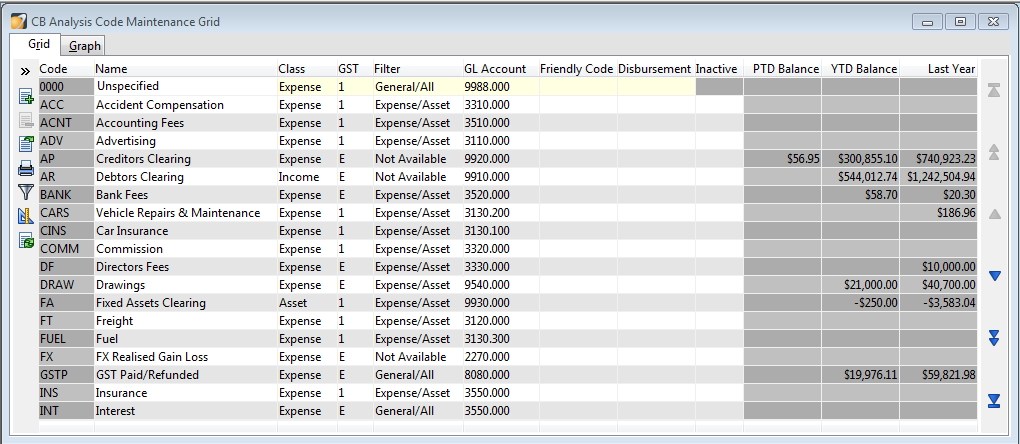
Cashbook
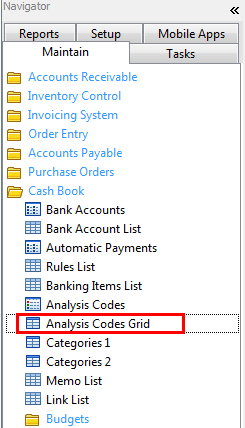
Analysis Codes in the Cash Book module
Maintain\Cash Book\Analysis Codes Grid
Click ‘Insert’ (F4)
Enter the appropriate information
For example: CODE: ADV, NAME: Advertising
ADV would have an expense class, and would be related to the advertising expense account in the General Ledger
Entering Module Transactions Direct to the General Ledger
A number of modules allow you to enter transaction direct to the General Ledger bypassing the need for an analysis code.
To do this:
In the transaction screen customise the grid (Alt+F5) to show the GL Account Code field

Enter the transaction as per normal
Use the drop down under the column GL Account Code to select the account the transaction is to be entered too
Note: This will overwrite the analysis code if you have entered it.

General Ledger Restricted Access
Restricted access in the General Ledger gives the opportunity to lock users from being able to enter transactions to certain General Ledger Accounts.
Setting users up with restricted access to General Ledger accounts is a two-step process as outlined below:
Step 1 – Changing User Permissions
Setup\Company\Users_Users, Groups and Roles\Permissions tab
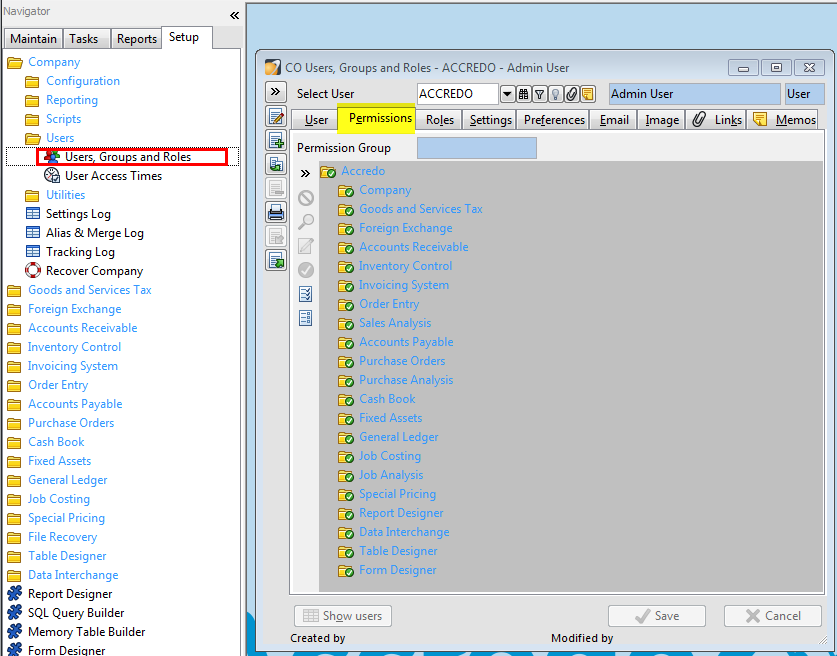
Select the user access is to be restricted for
Select Edit (F11)

Select General Ledger
Click on the field Restricted Access
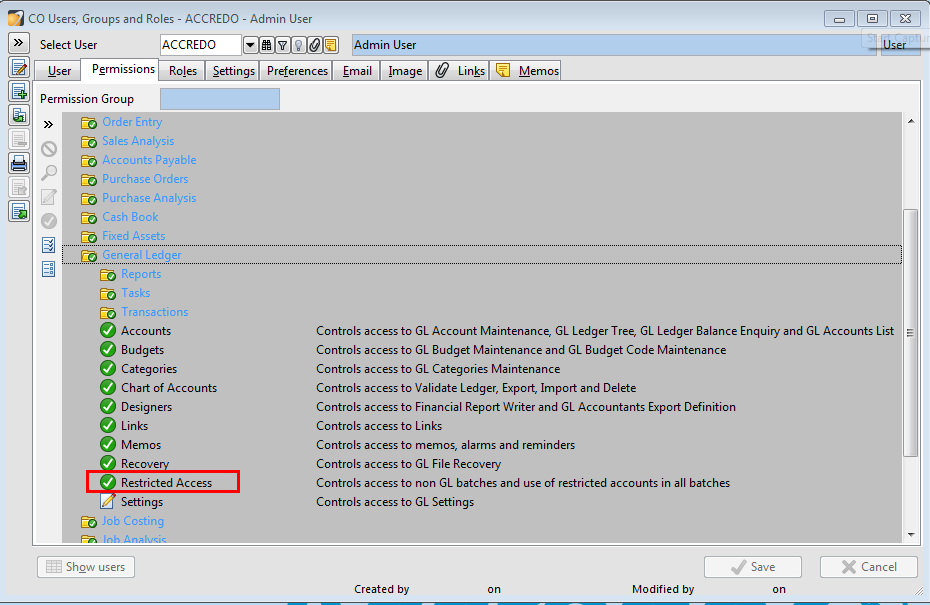
From the drop down, box that appears select All None (Alt + N)
Click Save
Step 2 – Restricting Accounts
Maintain\General Ledger\Accounts
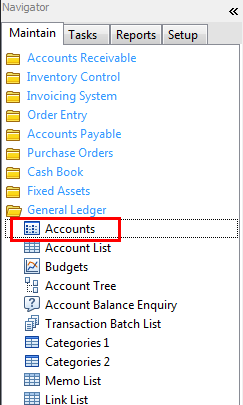
Select an Account you wish to restrict
Select Edit (F11)

Tick the box titled Restricted
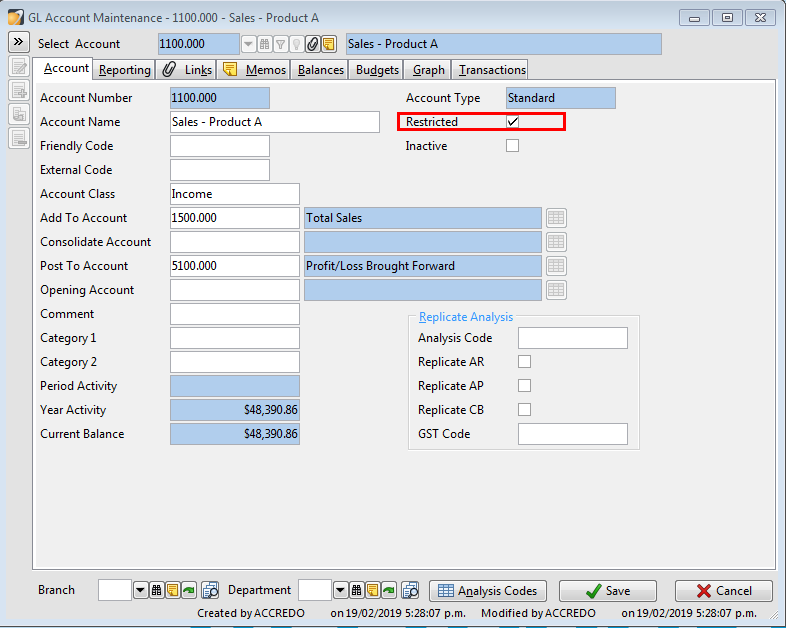
Click Save
Users setup with no access in users and permissions will not be able to enter transactions to the accounts with restricted ticked.
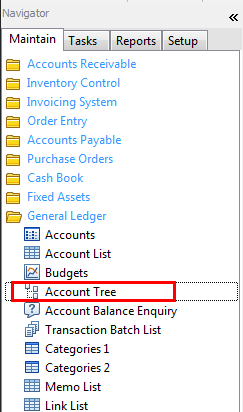
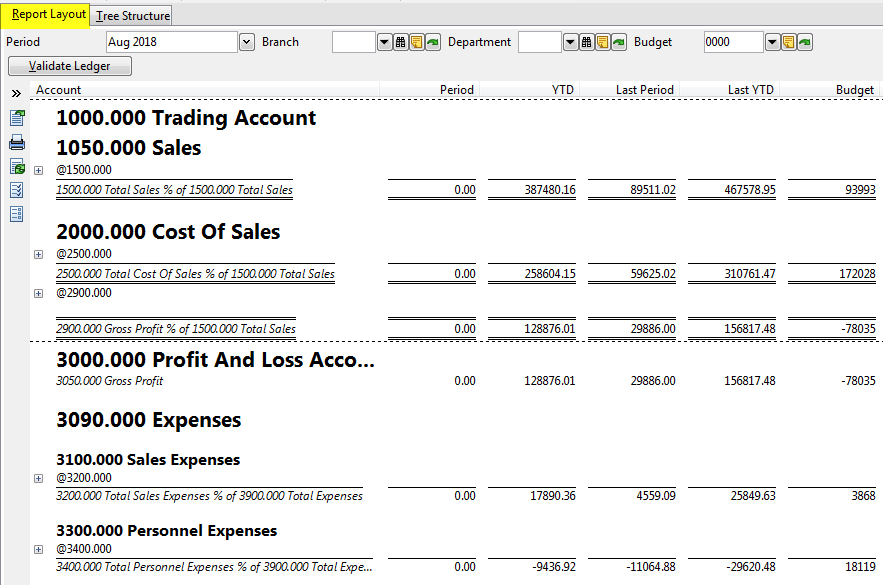
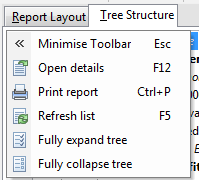
Ledger Tree
The Ledger Tree allows the user to view all General Ledger accounts at once. There are two different views for the ledger tree. The report layout view shows the account layout as it will appear in the Financial Reports with Period, Year to Date, and Last Period Balances. The Tree structure view allows the user to view the General Ledger Structure in tree form.
Maintain\General Ledger\Account Tree
Report Layout View
Tree Structure View
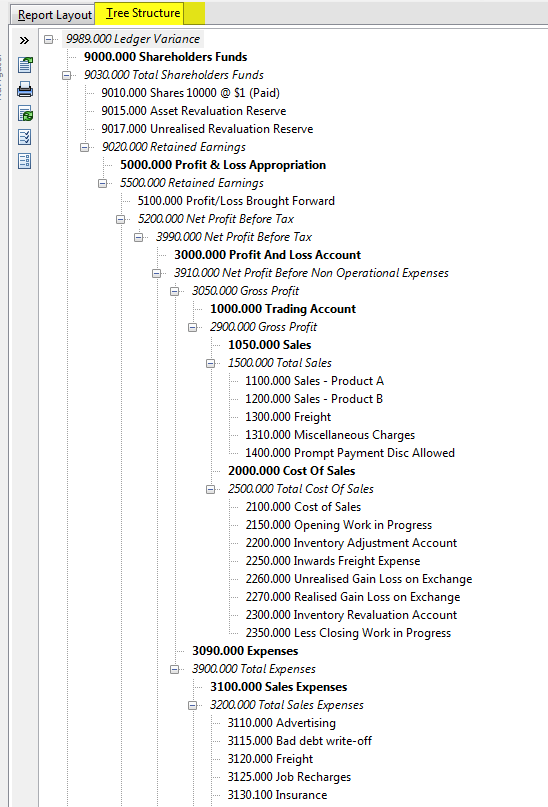
· You are able to fully collapse of fully expand the ledger tree by selecting the below buttons:
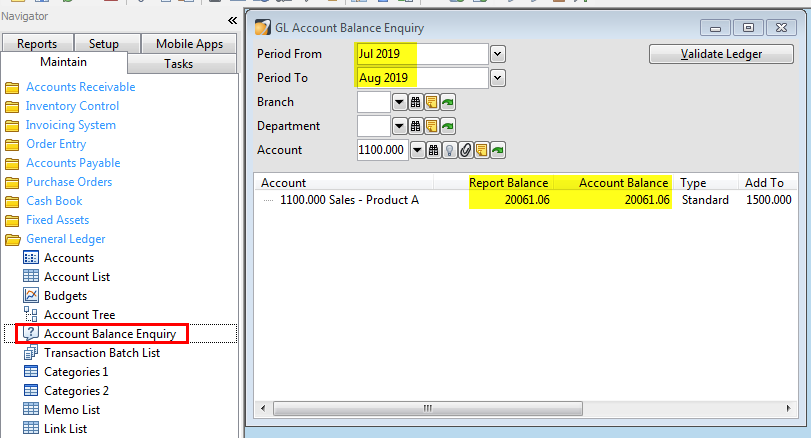
Ledger Balance Enquiry
The Ledger Balance Enquiry allows the user to look at the balances of General ledger accounts for single or multiple periods. Two steps are involved with this:
Select the Period Range
Select the Account
General ledger Budgets
General Ledger Budgeting allows you to set budgets for GL Accounts and report on those budgets versus actual balances. For Saturn user’s budgets can be set for each account for every branch and department. A budget is set for the specified financial year.
Setting Budgets is a straight forward task that is simplified by the use of some of the available functions in the budgeting area.
To set budgets:
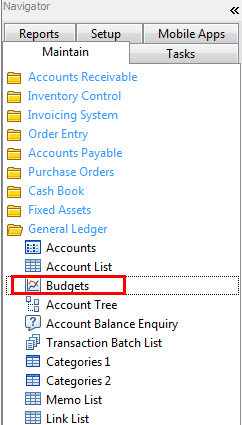
Maintain\General Ledger\Budgets
Select the Account a budget is to be set for
Select the Year Ending the budget is to be set for
Note:
Select the Branch the budget is being set for
Select the Department the budget is being set for
Click Edit
Enter the Budget for each period
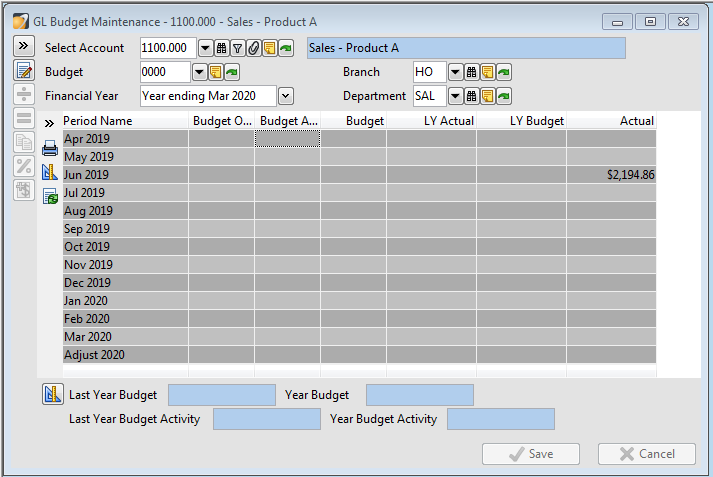
Alternatively, you can:
Click the Split budget amount button and enter the Total figure – click OK and the Total amount will be split over the periods

Click the Repeat budget amount button and enter the figure that is to be repeated for each month – click OK and the amount will be entered into each period

Select the Copy Budget button which will copy the figures from last year’s budgets or Last Year’s Actuals

Note: Budgets can be imported via an excel spreadsheet, but an import definition will be required for this.
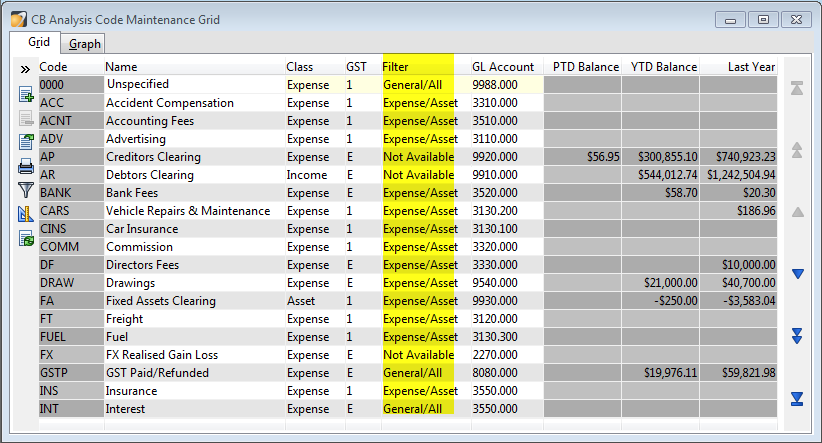
Analysis Filters
Maintain\Cash Book\Analysis Codes Grid

For Cashbook it is important to note the Filter that is applied to the code. If an Analysis Code has a filter of Expense/Asset only Cheques will be able to be drawn from this code. If the account has a filter of Income/Liability only Deposit transaction can be entered to this. If you wish an account to be available for both you can apply a filter of General/All.
To edit the filter, select the code you wish to edit and click in the field underneath the grid heading of filter. Use the drop-down arrow to select from the list of options.
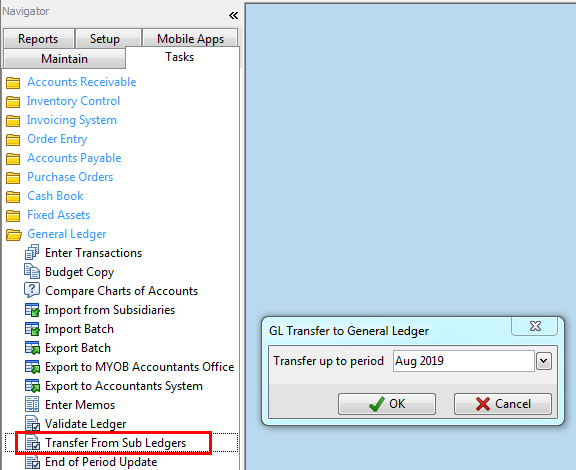
Transferring Module Transaction Batches to the General Ledger
This option is available from the Tasks tab of the navigator. It will automatically generate a transaction batch for the General Ledger to enable you to easily keep your General Ledger up to date.
Each transaction batch is specific to the module you are transferring to the General Ledger.
Note: When a batch transfer is done it includes everything up to and including the month selected.
The batches created will have separate entries for each transaction entered in the specific module i.e. for each transaction it debits or credits the relevant control accounts and sales accounts. The dates for the lines in the batch are the individual transaction dates.
Select the Tasks Tab
Select the module you wish to transfer transactions to the General Ledger for
Select Transfer to the General Ledger
Select the Period you wish to transfer transactions up to.
Click OK
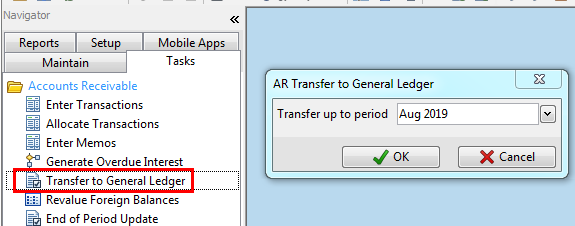
This will transfer the batch to the General Ledger. The batch can then be posted immediately or posted at a later date.
Note: You can also go to Tasks\General ledger\Transfer from Sub Ledgers to transfer from all modules
Posting Batches to the General Ledger
Posting batches to the General Ledger is a straight forward process
You can only post batches that fall within the available period window (between first and last available period
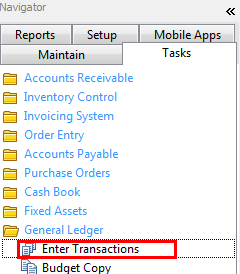
Tasks\General Ledger\Enter Transactions
Note: It is important to take a backup of your data before posting batches to the General Ledger.
In the screen in front you will see transaction batches already there if you have transferred from the various modules. These transactions will have the name of the module transferred under the details heading and have a class of module batch.
Open the transaction batch by selecting the transaction and clicking the open details button.
Check that the transactions in the batch are correct
Repeat this process for all batches if wanting to post all batches at one time
If wanting to post all transactions relating to the period, select the post all batches button (Post all up to current period Alt+A)

If wanting to post batches individually select the batch you wish to post and click the post individual batch button (Post selected Alt+T)

Once you have chosen to post the batch Individual transactions the batch will be posted to the General Ledger accounts.
Printing Financial Reports
Reports\General Ledger\Financial Reports
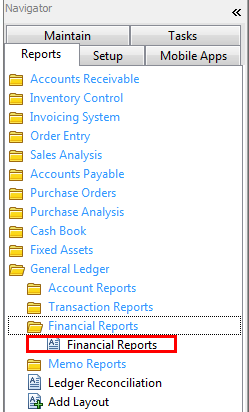
· Select the Destination
· Locate the Report File Name by clicking the three dots to the right-hand side
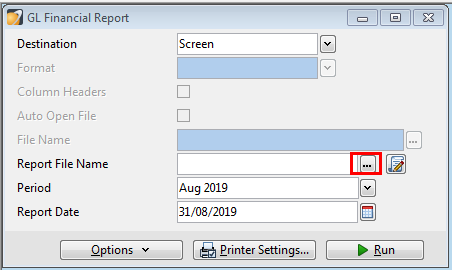
Note: This will automatically default to the location where the reports should be saved
Select the Period you wish to run the report for
Select the Report Date
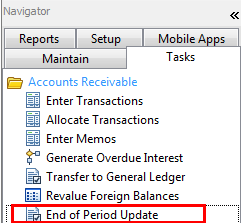
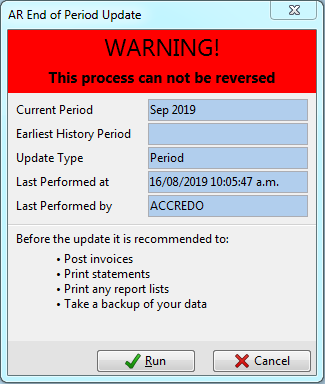
End of Period Updates
End of Period Updates are run for all of the major modules. This will roll the modules over to the next period. This will progress the aged balances in accounts payable and accounts receivable.
Note: Before running an end of period update ensure that you have run a backup of the company. You should also Print Statements
Tasks\Module\End of Period Update
If there are unposted transactions a warning will pop up. Check that the unposted transactions are OK to remain unposted or post them if they should have been posted in the period you are about to close off.
Click Run
Repeat for all necessary modules