Stocktaking
In this lesson you will learn about using the Accredo system.
After completing this lesson, you will be able to:
Create and Edit a Stocktake.
Understand different types of stocktakes.
Stocktaking
To perform a stocktake, navigate to: Tasks > Inventory Control > Stocktake Processing > Generate Stocktake.
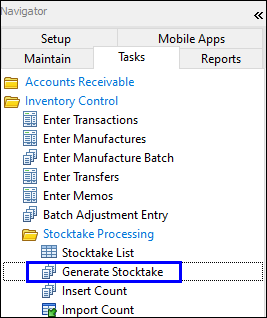
Enter details into fields, selec the count type (See below for information on count types), then Run.
Count Types
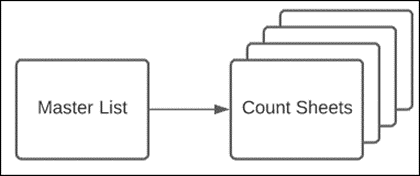
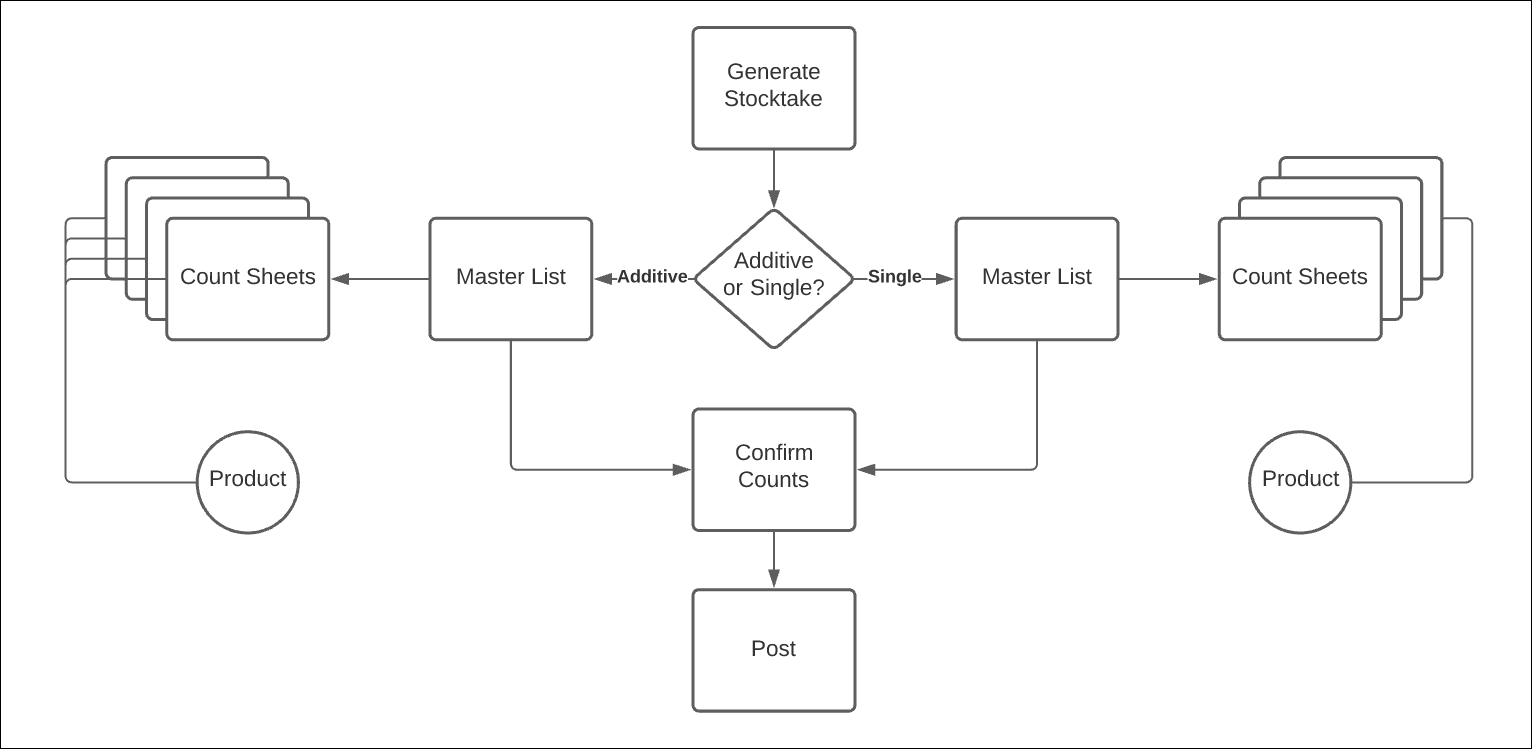
Count types define how to make a list and count sheet(s), it also defines how you want them to be counted.
A master list can have many count sheets.
Basic: Allows for updates of product quantities only.
Single: A product can only exist on one count sheet.
Additive: A product can exist on multiple count sheets at once.
General Stocktake Process Flow.
How to perform a basic stocktake
How to perform an additive stocktake
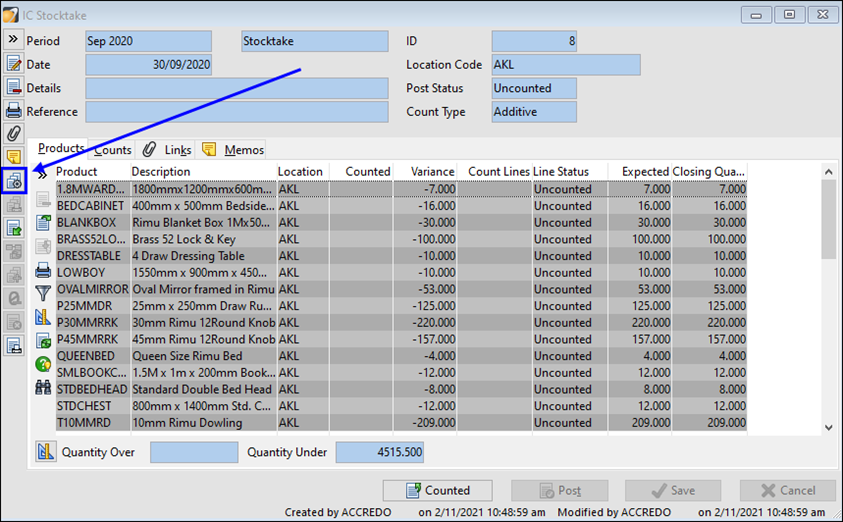
Stocktake Generated
Once the stocktake has been generated, select Generate counts.
Enter Details:
Product Range
Generate for
Uncounted Products
All Products
Variance Products
Count Per
Creates a new count per field selected.
E.g., Count per bin location will create a new count for each bin location a product is assigned to, and will group together all the products into the same count that have the same bin location.
Number of counts
Generates the selected number of counts
Only available
Confirm Generated Counts
Details
The name of the count(s)
Run.

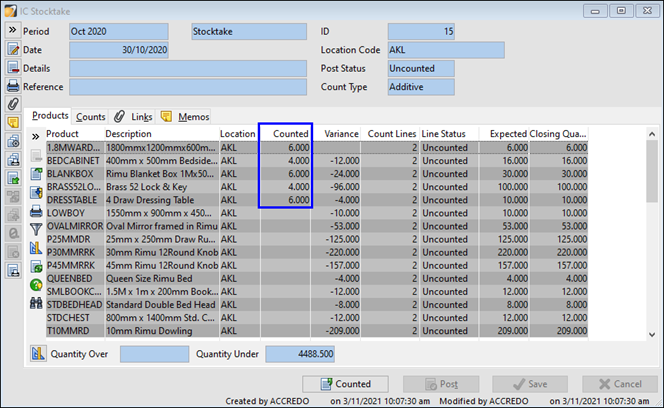
Running a count for the uncounted products as per the image above will product one count sheet as per image below.

Double clicking the count sheet will open it. This count sheet is editable where you can input the amount of each product counted.
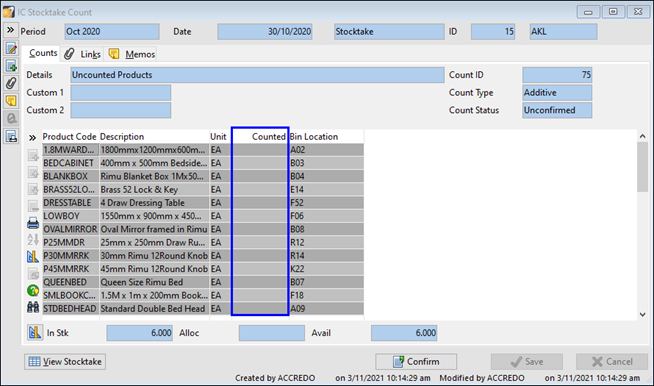
After editing the counted fields, save the form.
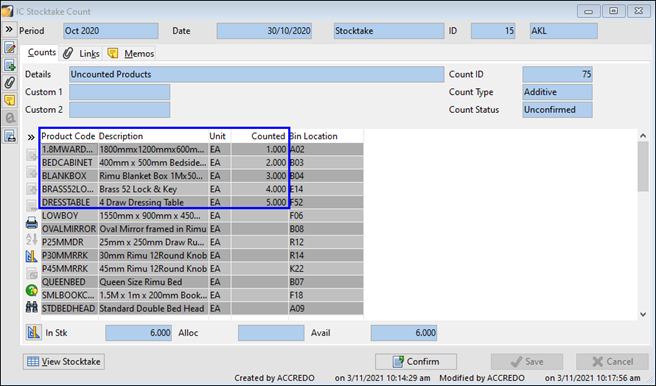
Close the count sheet and navigate back to the Products tab of the master list. You will notice the products will now have counts added to them.
Generate another count sheet for all products, open that count sheet and add count to the same products that count was added to previously.
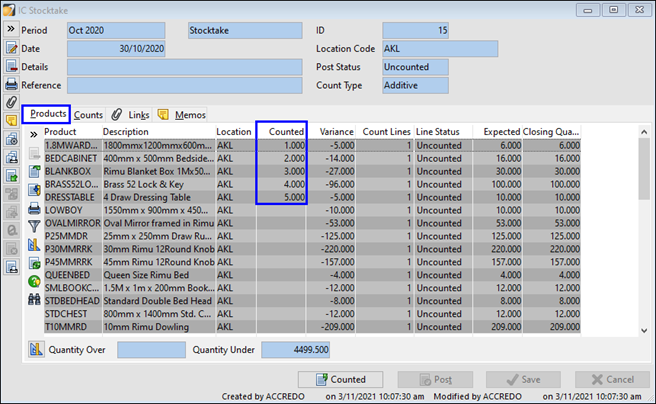
Navigate back to the master list on the products tab, notice the counted is now an addition of the two count sheets.
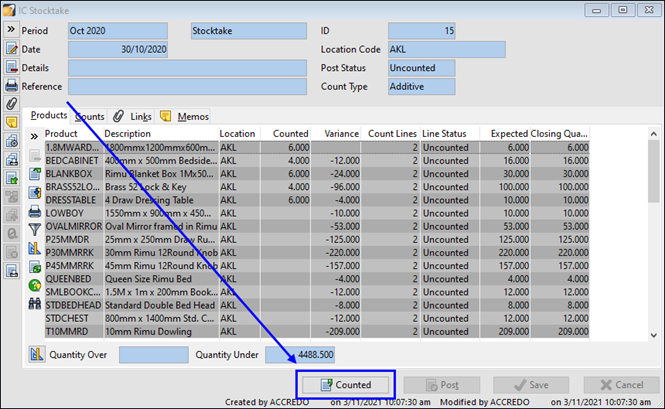
Once stocktake is completed, select counted.
Once stocktake is counted, select Post.

Common Issues
Nothing to Generate
A stocktake will not be generated if there is already an existing stocktake for the current location and period.
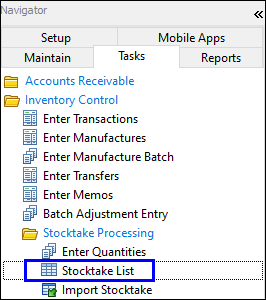
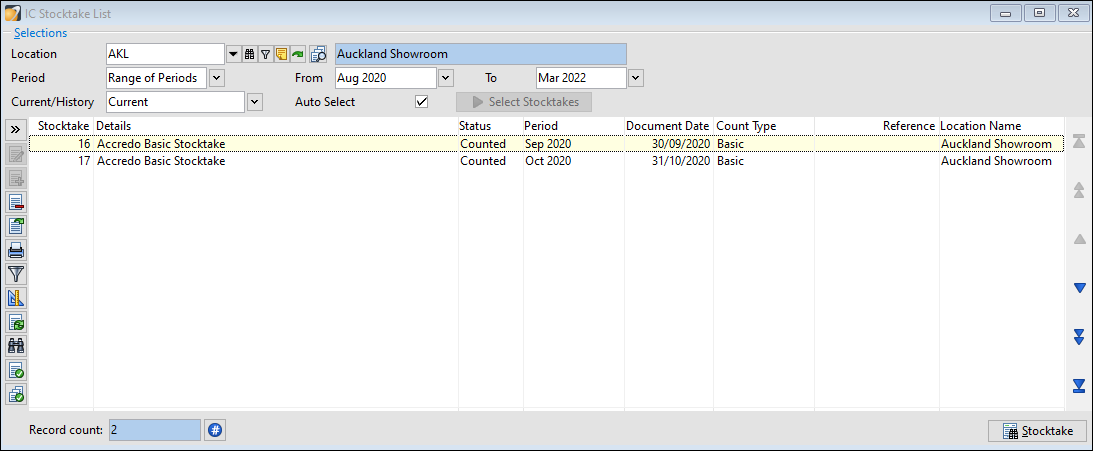
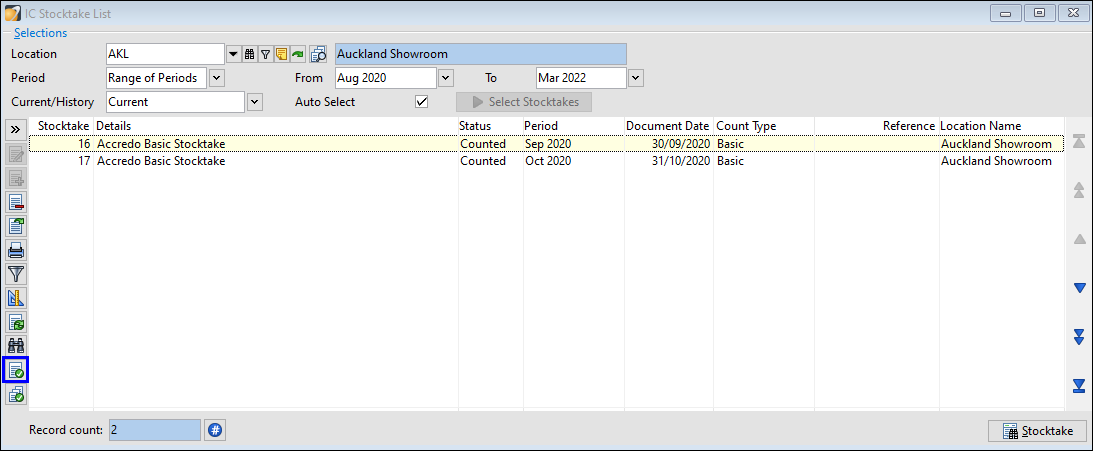
To see all stocktakes, navigate to Tasks > Inventory Control > Stocktake Processing > Stocktake list.
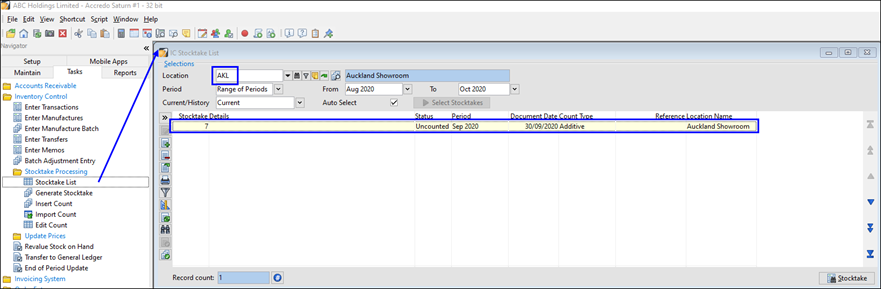
Select either location and/or period to see the current stocktake.
How to perform a basic stocktake
Check settings and reports
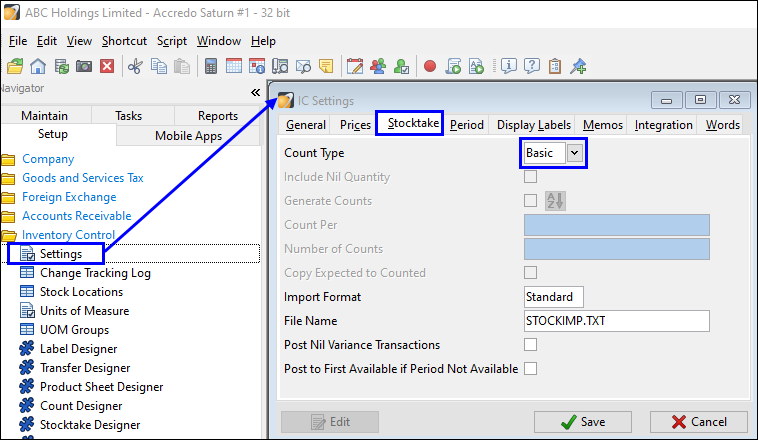
Set the Count Type to Basic. Go to: Setup > Inventory Control > Settings > Stocktake Press
Edit and set the Count Type to Basic then press Save.
Add Stocktake Forms. Go to: Reports > Inventory Control > Stocktake Reports > Add Layout.

Make any changes, e.g., you may wish to Sort by Bin Location.
Once completed, Save to add the Stocktake Forms to the menu.

Basic Stocktake Process
Check Invoices and Accounts Payable Shipments Receipts are posted.
Print Stocktaking Forms. Reports > Inventory Control > Stocktake Reports > Stocktaking
Forms.Count Stock and enter it onto form
Enter Quantities. Tasks > Inventory Control > Stocktake Processing > Enter Quantities.
Make any selections then press Run. The current Period for IC is selected by default.
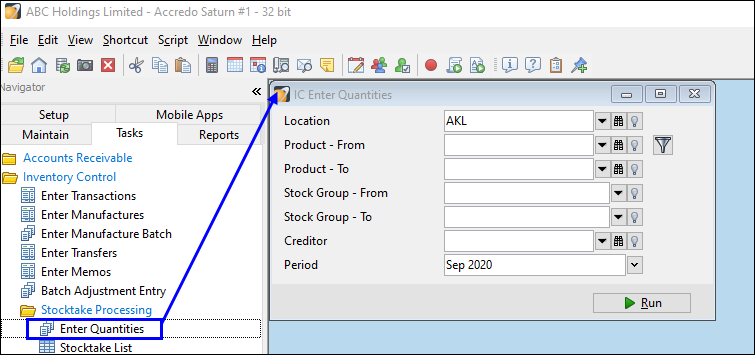
The Stocktake Enter Quantities form will open with the Counted Quantities matching the
Expected Quantity
Note: If you applied a sort to your Stocktake forms, you probably want your Enter Quantities screen
sorted the same way. You can use the Sort button, or an event script to do this.
Enter the Counted Quantities and as you do, you will see that Counted field becomes ticked as
soon as you have moved off the field.
For Products with no variance, you can press the Mark Counted button or press F4, which marks
them as counted so you can easily see where you’re up to.
There is also a Mark All Counted button you can use to mark the rest of the Products as Counted if they have no variance.
Note: As soon as a Product is marked as Counted you can carry on with receipting and invoicing
that Product and the variance won’t change. You don’t have to wait until the Stocktake is posted.

Check your Variances. When you have finished keying in your Stocktake Count, go to the
Stocktake List. Tasks > Stocktake Processing > Stocktake List.
All the products marked as counted will have been added to a Stocktake. Double click the Stocktake to open it.
You may want to Edit the Stocktake and add a Reference which will be used as the Adjustment Transaction Reference when the Stocktake is posted.
Press the Print button to print your Variances. You can sort this by Variance Amount.
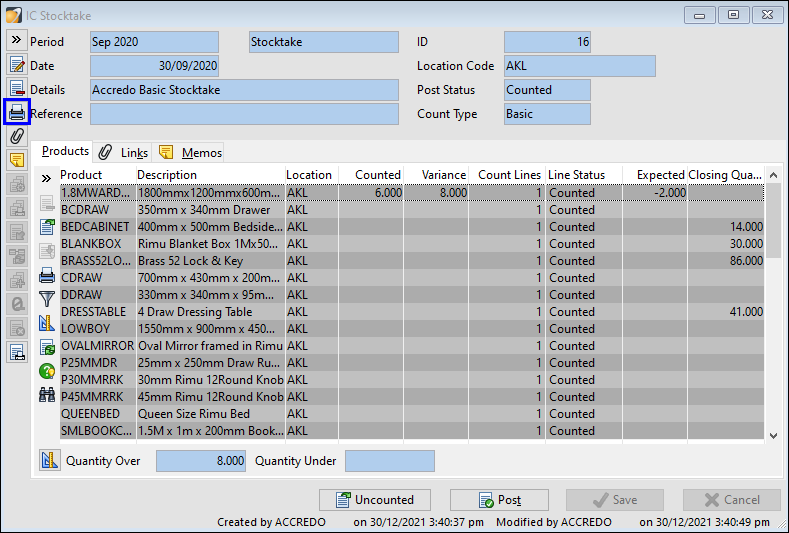
The Stocktake Report will print showing your Variances.

If you need to fix any errors, go back to Tasks > IC > Stocktake Processing > Enter Quantities.
Post your Stocktake to create the stock adjustments. Tasks > Stocktake Processing > Stocktake List. Select the Stocktake and press Post.
The Stocktake is changed to Posted and any adjustments entered.