General Overview Of Accredo
In this lesson you will learn about using the Accredo system.
After completing this lesson you will be able to:
• Open, log in and Navigate Accredo
• View detail or list Products, Customers, Creditors etc.
• Search and Filter for items.
• Change how Accredo looks.
• Understand how periods work, and how Accredo Locks data
Getting Started
Logging In
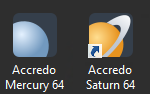
· Double click on the Accredo Saturn or Mercury icon to launch Accredo.
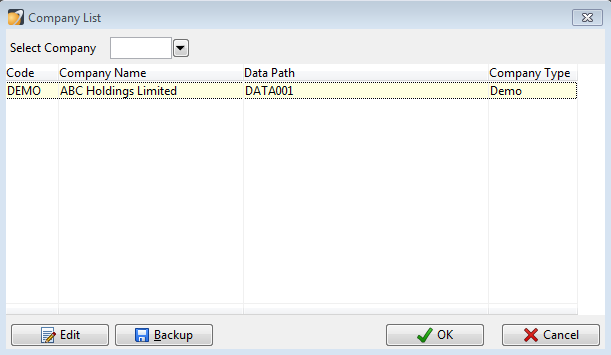
· You’ll be presented with a list of the available company files. Double click one to Log in.
· Enter your username and password. You may be asked to reset your password the first time you log in.

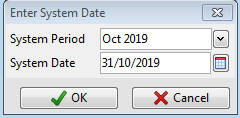
You may be asked to enter a system date(today’s date)
The Navigator
The Navigator is the main menu of Accredo – It is how you access most of Accredo’s functionality. You can bring the Navigator up at any time by pressing the Home Button (Alt+F10).
The Navigator has
five tabs:
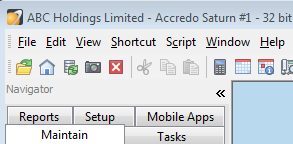
· Maintain
This is where you go to create new records (Customers, Products, etc.). View and edit details, and access lists of documents.
· Tasks
This is where you’ll spend most of your time. Tasks include all day to day transactions and functions. Issuing Invoices, Receipting stock – it all happens here.
· Reports
This is where you’ll find all the different reporting and analysis tools. You can also print and email important documents from here in batches.
· Setup
You probably won’t access this area much. It lists the options and settings for Accredo.
The shortcuts under each tab are grouped into module folders, and sometimes sub folders by function.
You may also have additional tabs for custom functions or end of month processing.
Accredo won’t show you shortcuts for anything you don’t have permission to access – so if you are missing something that someone else has please talk to whoever sets up your permissions.
Accredo Modules
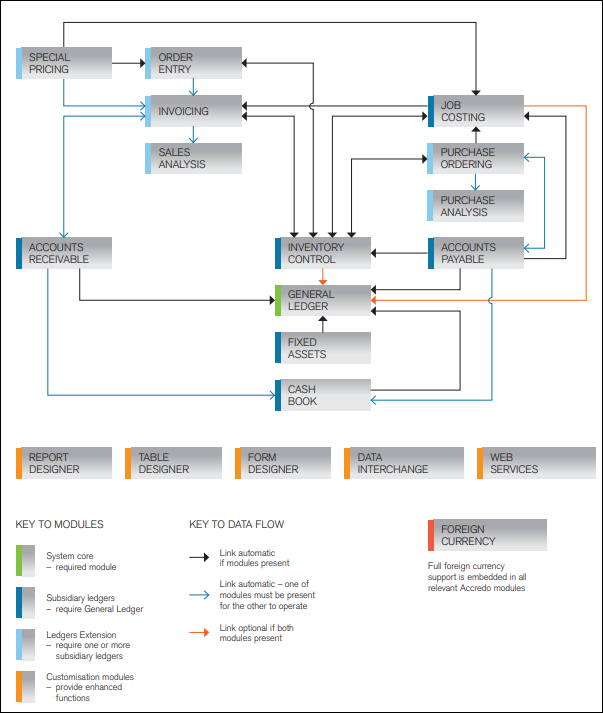
Each module allows access to a different set of features, the various modules interact and all flow back to the General Ledger. The modules are often referred to by their initials.
Getting Help
If you need assistance with Accredo you have a number of options.
· Ask Someone else
One of the best ways for your organisation to get better at Accredo is to help and share information amongst one another. We often set up a “Superuser” they should be your first stop.
· Check the help file
Accredo has a very comprehensive help system. Pressing the “F1” key at any time will take you to the help page for the area you are currently in.
· Check the Zeal Systems Notes
We will provide general notes on the system, and specific notes on any custom areas – these should be saved on your network.
· Give us a call/email.
Our contact details are on the final page of these notes. We’re happy to help you with any questions you might have.
Accredo Interface
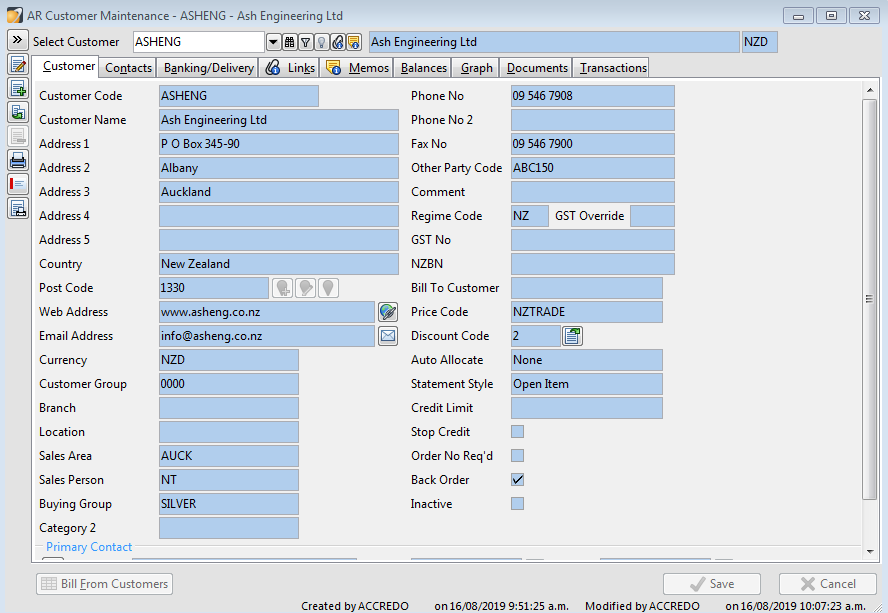
Masterfile Maintenance View
Each type of Masterfile (product, customer, creditor, job etc.) has a maintenance view that allows you to view all the details associated with that item. The views differ by Masterfile but follow the same general format.
Buttons
 | A drop down for selecting the record (and/or customer), you can type the record name into the drop down or pick from the drop-down list. |
|---|---|
 | Search for text in the record’s name or description. |
 | Filter the list to only records that meet certain criteria. |
 | Show Inactive / hidden records. |
 | Display linked/attached files (White i means links exist). |
 | Display memos/alarms/reminders (White i means notes exist). |
 | Edit the selected record. |
 | Insert a new record. |
 | Duplicate - Make a copy of the selected record. |
 | Delete the selected record (not always available). |
 | Print Label |
Other Buttons in Accredo
 | |
|---|---|
 | Print Preview, Preview a Document without changing the “Print Status” to Printed |
 | Show all Records, Usually on List, to remove the Master record filter. |
 | Post, Post a Transaction. |
 | Save |
 | Cancel |
 | Expand Toolbar (Alt + F9) will show further options |
Tabs
The tabs allow you to switch between various screens of information regarding that record. Each type of Masterfile has slightly different tabs, but they follow the same general pattern.

· The first few tabs, hold Details about the record such as name, description, lists of contacts, or addresses etc.
· The Links and Memo’s tabs shows lists of any related attachments or notes.
· The Graphs tabs allows you to create basic graphs on relevant data.
· The Documents tab shows the related documents like Purchase Orders, Invoices etc.
· The Balances and Transactions tabs show the month end and day to day entries respectively.
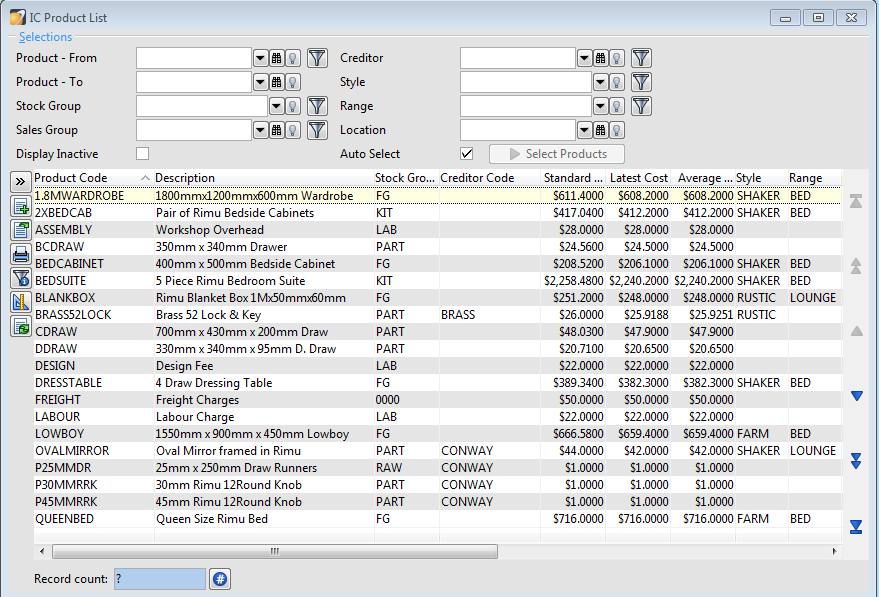
List View
Each module also has a List view – this allows you to quickly list all the records, or just those that meet certain criteria. Double clicking on a record will open it up in the maintenance view.
Click “Select …” to show the list that meets your current specifications.
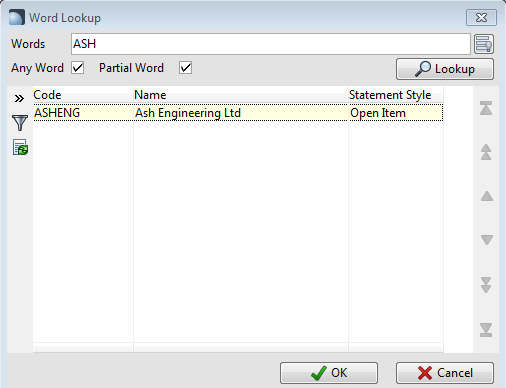
Searching
The search button (Shift+F2) allows you to quickly find a specific record by its name or another indexed field. Ticking the two options generally makes it easier to find what you a looking for (you can be less specific). Again double clicking an entry will open that record.
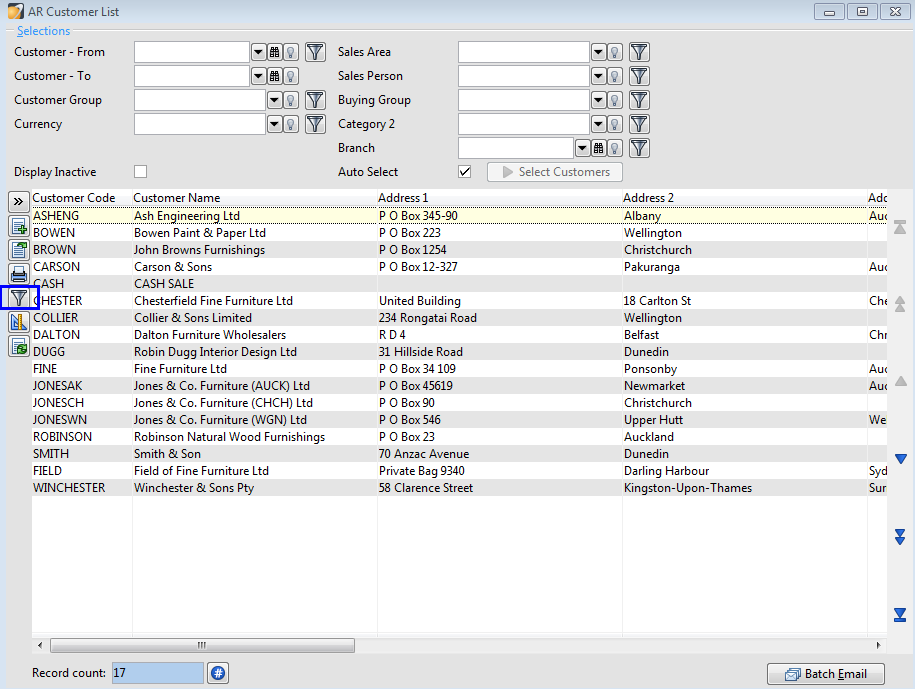
Filtering
Filtering is useful to limit the available list of records to just those that meet certain criteria (including multiple criteria). You can also use filters to reorder records.
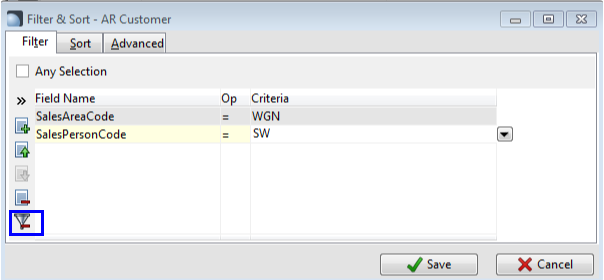
Apply a filter
Click on the filter icon
· Click on the drop-down box in the ‘Field Name’ column and select a field to apply a filter on
Note: The ‘Field Name’ column contains all fields in the source data file that are available for filtering.
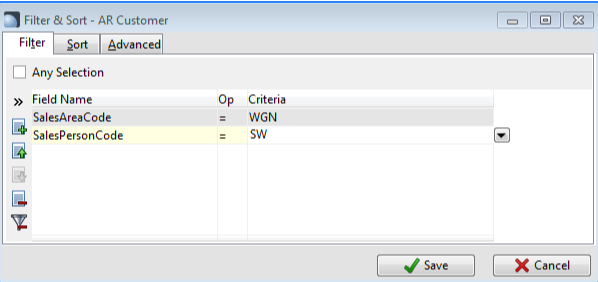
· Select a condition from the OP column
Note: The OP (Operator) column enables you to set a condition for the filter (for example, equal to (=) or greater than (>).
· Enter the filter criteria.
· You can add additional criteria on the other lines.
· Click Save when finished.
NOTE: To clear a filter click the ‘Clear Filter’ button
Sorting Data
· Click on the ‘sort’ tab.
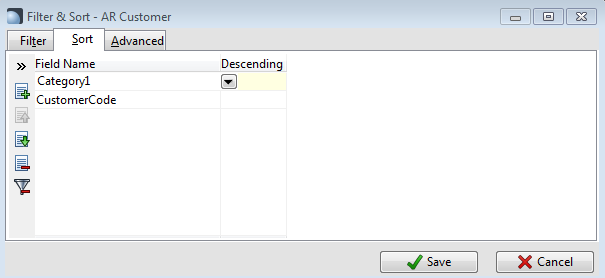
· Click on the drop-down box in the ‘Field Name’ column (as above) and select a field.
· Lines will be sorted by each line in order from the top down. This allows you to group data.
o In the example above customers will be grouped by their Location then ordered from lowest to highest based on their sales last year.
· The descending column determines how the data is sorted.
o Unchecked: The sort will be in ascending order A-Z, 0-9, Old to New.
o Checked: The opposite order.
Grid Customisation
Anywhere that you view a table of data we call a grid. The default grids may show information that is not relevant to you or omit something vital. You can customise these by user or across the whole system.
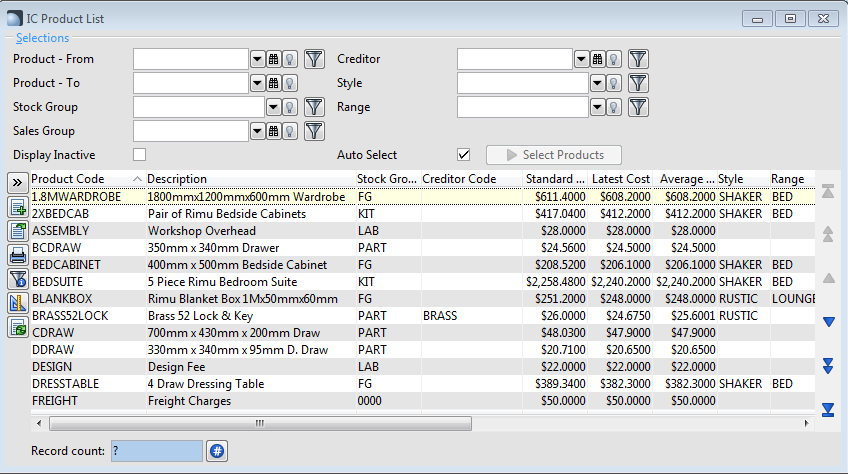
In the example above, we might want to remove the creditor column and show the quantity in stock.
Click the customise button
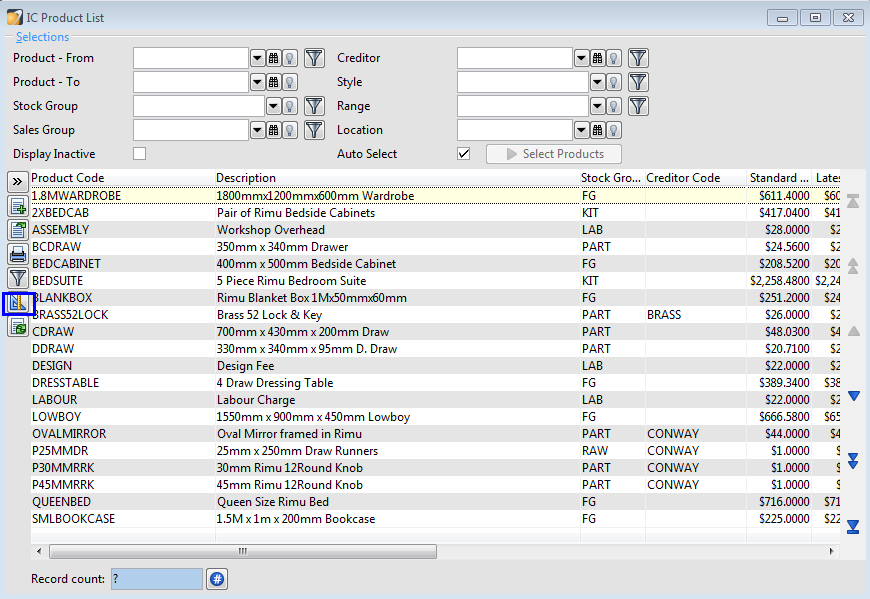
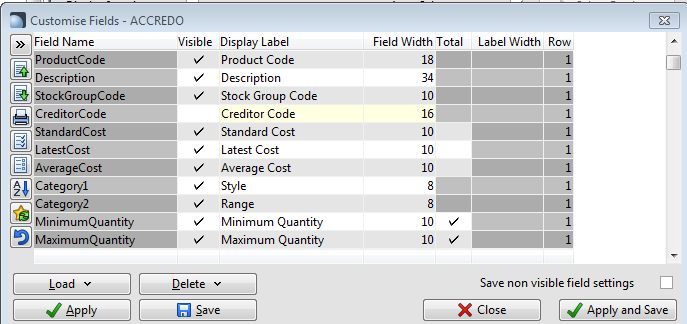
The order of the fields top to bottom is the order of columns left to right
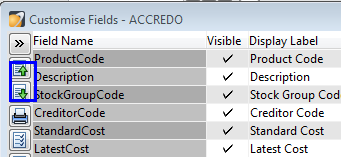
Fields can be shifted up and down in the grid by using the up down arrows on the left-hand side of the screen
Fields can be added to the grid by placing a tick in the box headed visible.
Display Labels can be changed to something more pertinent to the user.
The width of the field can be adjusted
Click “Apply & Save” and a screen like the following will appear

This screen gives you the option to save the customised grid for a specific user or Global for all users. The Customise icon shows which users currently use their own customised view.
Periods, End of Month and Locking
Periods
Time in Accredo is broken into years and periods. Periods are generally set up as months. Transactions will require both a date and a period. You cannot save a transaction if the date does not sensibly lie within the period.
Users and modules can be restricted to only be able to record transactions a certain amount of periods forward and back.
End of Month
End of month processing in Accredo is much more flexible than most systems. There is generally no need to immediately roll a period on the 1st of the month. The End of month process is described in detail in other training notes.
Locking Data
Most transaction data can be edited and changed until it is confirmed. We usually call this confirmation “Posting”. Most areas allow you to save without posting. Once a document or transaction is posted it cannot be changed or removed. You would have to enter an opposite (contra) transaction to negate it.
This is to allow a proper auditable “paper-trail” in the system. Most changes you make in Accredo are recorded against your user name.
You can continue posting data into a previous period as long as you have permission to do so. Transactions effecting GST can no longer be posted once a GST return is accepted.
It is possible to lock down a period or year for absolutely no entry if required.